Showing posts with label Sitecore. Show all posts

Tuesday, April 5, 2022

Content Workflow and the Sitecore Workbox

 Welcome to the second part of Productivity Tips for Sitecore Content Authors and Experience Marketers. In the first post, I covered content governance and listed important considerations when creating your policies and processes.

Keeping in step, the second part of productivity is the importance of having a defined content workflow. Your content workflow outlines the work processes of who will create and review new content, and who will enforce the rules outlined in the governance policy, before content is published for the world to see.

Many companies do this “instinctively” (without a clearly defined process) so it isn’t always enforced or consistently followed so shortcuts are often taken. These shortcuts can cost companies tens of thousands of dollars, if legal issues arise, or damage the company’s reputation as I described in the post on content governance.

So where do you start with Content Workflow?

Great question! In fact, the place to start is by asking yourself several questions while thinking about your current process. Consider your company's rules and regulations around each stage of your content's life-cycle such as creating, publishing, archiving, retaining and disposing of content along with it's rules around data collection and information exchange. Be sure to document the answers so you can translate them into Sitecore workflow states, commands and actions. Examples of questions you should ask:

  • Who determines what content gets created?
  • Who writes the content? Are there different rules and regulations for different regions and or languages?
  • Who’s responsible for the styling and branding of content?
  • Who ensures the content is “accessible” to those with disabilities?
  • Who edits/approves what is written to ensure it falls within the style guide and governance policy?
  • What happens when content is rejected by an approver?
  • Who checks to ensure the content is not damaging or copyright protected?
  • Who publishes the content once it’s approved?
  • What is our process for archiving and removing content?
  • Are there government or industry regulations we need to take into consideration?

Once you have the answers documented you can diagram it and use the diagram to construct and configure your workflow within Sitecore. Because every business is different, Sitecore allows you to custom design one or more workflows for Authoring, Publishing, Archiving, Retaining, and Disposing of content. Don't worry if it's not perfect from the start, you can always adjust and tweak the workflow as your process becomes better defined or changed.

TIP: You can also use Sitecore’s sample workflow as a starting point and modify it to meet the needs of your organization. Here is a process diagram of the default states within Sitecore’s Sample Workflow.

Sitecore Sample Workflow Diagram

In the above diagram, the green arrow for Auto Publish is an automatic action that has been setup to publish content the moment it has been approved.

Here is the Sample Workflow as configured within Sitecore:

Sitecore Sample Workflow Tree Configuration

Notice in this version of Sitecore (version 8.0) there are two “Approve” actions. The “Approve with Test” is a quick way to begin an A/B Test between the new version of content and the previous version. To skip testing the content approver would choose the “Approve without Test” action.

Best Practice Notes:

  1. Always launch a site with Workflow defined and implemented as it can be hard for Content Authors to unlearn bad authoring habits down the road.
  2. Include a step that Approves content for publishing to the “stage” or "pre-production" for a final review – this can be done in the building phase to encourage the use of workflow before the site goes live.
  3. If you are not able to define an accurate/complete workflow up-front, and implement it before you launch, use the Sample Workflow to start, and develop the habit of using it.

Dangers of Not Having a Workflow Process

Still not convinced you need a workflow? Consider the following.

  1. Without a workflow in place it’s very dangerous to use the “Publish Site” option (often requested when installing Sitecore modules), because you don’t know what’s ready and not ready to be published live.
  2. As mentioned earlier, it’s hard to change authoring habits and implement workflow later when there are hundreds or even thousands of items not in workflow.
  3. It's harder to enforce the content guidelines and legal reviews of content if it’s not built into the solution. Anyone can publish content, whether it’s poorly written, copyrighted or otherwise.

Once you have a workflow in place, you can use the Sitecore Workbox to review all the items awaiting approval, check the differences between versions, and assign access to these items to one or more approvers.


Additional Resources

Monday, April 4, 2022

Sitecore Experience editor error /ribbon.aspx siteName

 If you see this error when you open a page in experience editor, then this is the post you should look for.

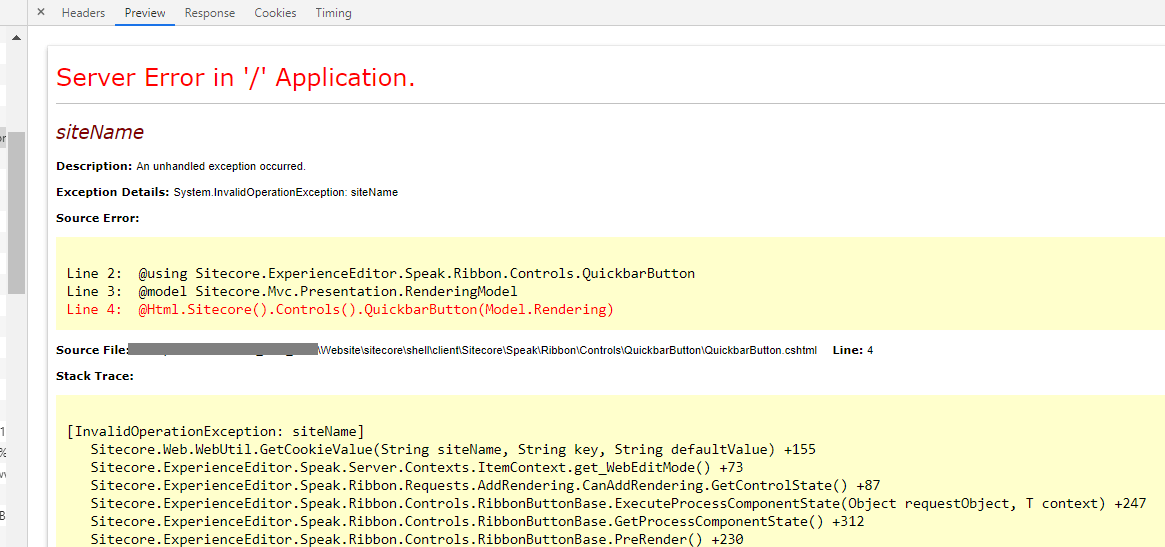
Below is the screenshot of how the error looks from experience editor. The ribbon will completely error out and does not load.

Image Text

If you check the network tab on the chrome browser developer tools, you would see the below request would show a 500 server error. If you preview the request response, then you would see the detailed error as below.

https://mydomain/sitecore/client/Applications/ExperienceEditor/Ribbon.aspx?sc_content=core&ribbonId=%7B570A52B6-6755-461A-8052-5B95EF766F74%7D&itemId=%7BC5296239-4409-4279-BA52-851A6CF9AF38%7D&deviceId=%7BFE5D7FDF-89C0-4D99-9AA3-B5FBD009C9F3%7D&database=master&mode=edit&url=%2F%3Fsc_mode%3Dedit%26sc_itemid%3D%257bC5296239-4409-4279-BA52-851A6CF9AF38%257d%26sc_version%3D1%26sc_lang%3Den%26sc_site%3Dmysite&lang=en&pageSite=mysite&version=1

Image Text

The solution for this error would be to check the following setting.

<setting name="Preview.DefaultSite">

The setting value would be "Website" by default. If you are patching in your custom config files, make sure you are giving the name which is a valid site as per your SiteDefinition.config file.

Hope it helps. Let me know your thoughts.

Monday, March 7, 2022

Steps to update Sitecore SSL certificates (Sitecore XP 9.3)

 It's a general requirement to update the security certificates for the website.

It's more enjoyable when we work on the Sitecore, consider multiple endpoints like CMS, xConnect, Identity servers and XC Roles. I again got a requirement to update the certificates and wanted to share this with the community so everyone can quickly do this without any issue or hurdles.

So let's get started the journey to update the certificate :) 

Steps  1 - Open the mmc.exe


 Àdd certification--> computer account


Install your certificate and you will see your certificate here-


Copy the thumbprint of the installed certificate 


Copy the thumbprint of the installed certificate and keep in a file.

Now, got to certificate and add all application pools identifier.


Make sure you enter the name in   IIS AppPool\App Pool identifier name format otherwise you wouldn't get the identifier.


Now, Search for the existing thumbprint on the site, You will find in below files.

  1. Identityserver\Config\production\Sitecore.IdentityServer.Host.xml
  2. CMsite\App_Config\ConnectionStrings.config
  3. xconnect\App_Config\AppSettings.config
  4. xconnect\App_Data\jobs\continuous\ProcessingEngine\App_Config\ConnectionStrings.config
  5. xconnect\App_Data\jobs\continuous\AutomationEngine\App_Config\ConnectionStrings.config

After replacing the file, got to IIS site and choose the correct certificate and restart the IIS.

that's it, It's very straightforward.

Troubleshooting - 

1. I got this error after updating the SSL certificate.

Fix - I missed to include the identifier role in the certificate, After including that role this issue got resolved,

Sunday, January 9, 2022

Enable Basic Authentication in Sitecore 10 & IIS 10


Steps:

1. Install Authentication in IIS
2. Create a new account for basic login
3. Update configs in Sitecore 10.x
+) Web.config
add key="owin:AutomaticAppStartup" value="false"

+)Disable identity server in Sitecore 10
Sitecore.Owin.Authentication.Disabler.config.example
Sitecore.Owin.Authentication.IdentityServer.Disabler.config.example

Wednesday, December 22, 2021

Sitecore PowerShell script to remove all language versions except one

This post provides Sitecore PowerShell script to remove all lang versions except one for items under a Sitecore node recursively.

Here in my example, removes all language versions except for English language.

In some cases you may want to remove versions of an item or an entire node in all languages except one or few languages. In that case it is difficult to remove them manually. Instead if we can use a PowerShell script in Sitecore, it would make our job very easy.

Is this not the script you are looking for? Then check the complete list of Sitecore Powershell scripts

Steps:

  1. Retrieve all the child items recursively. Include the root item too.
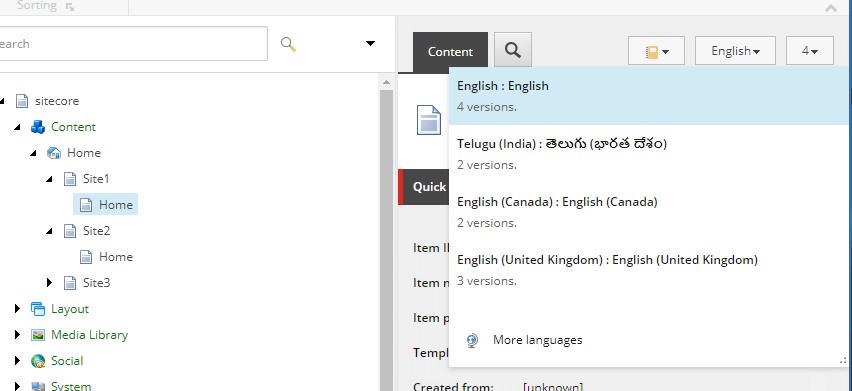
  2. For each item, get all the versions in all languages.
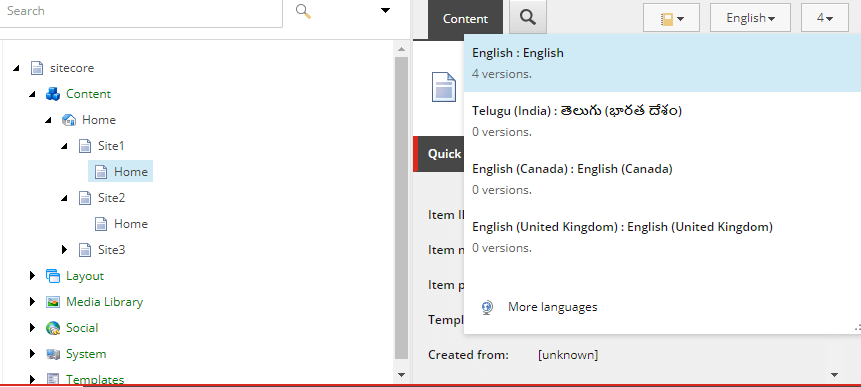
  3. Check if the language version retrieved is the one you want to remove.If so, use the Remove-ItemVersion to remove that particular version.

With versions

Versions deleted

Sitecore PowerShell script

$props = @{
   InfoTitle = "Remove Versions"
    PageSize = 10000000
}

$sourcePath =  "master:/sitecore/content/Home/Site1"

function Remove-Versions {

    $items = Get-ChildItem -Path $sourcePath -Recurse
    $rootItem = Get-Item -Path $sourcePath
    $items = $items + $rootItem

    foreach ($item in $items)
    {
        foreach ($version in $item.Versions.GetVersions($true))
        {
            if ($version.Language -ne "en")
            {
                Remove-ItemVersion $version
                Write-Host $version.ID " - " $version.Language "- deleted"
                $version;
            }
        }   
    }

}

$items = Remove-Versions
$items | Show-ListView @props -Property ItemPath, ID, @{Label="Language"; Expression={$_."Language"}} 
Close-Window

Wednesday, November 17, 2021

Sitecore Powershell script to unpublish items

If you want to delete or unpublish all items under a root item using PowerShell script then this is the post you are looking for. This script disables the 'publishable' option of an item in Sitecore.

Is this not the script you are looking for? Then check this complete list of Sitecore Powershell scripts

Unpublishing an item

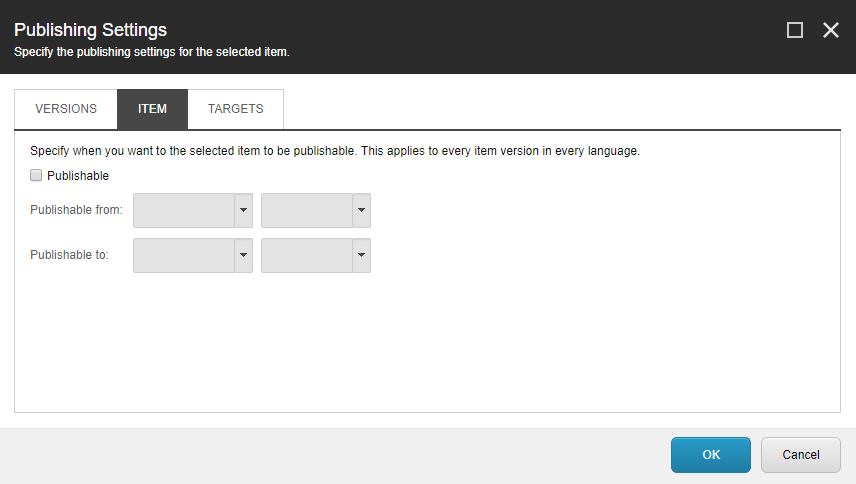
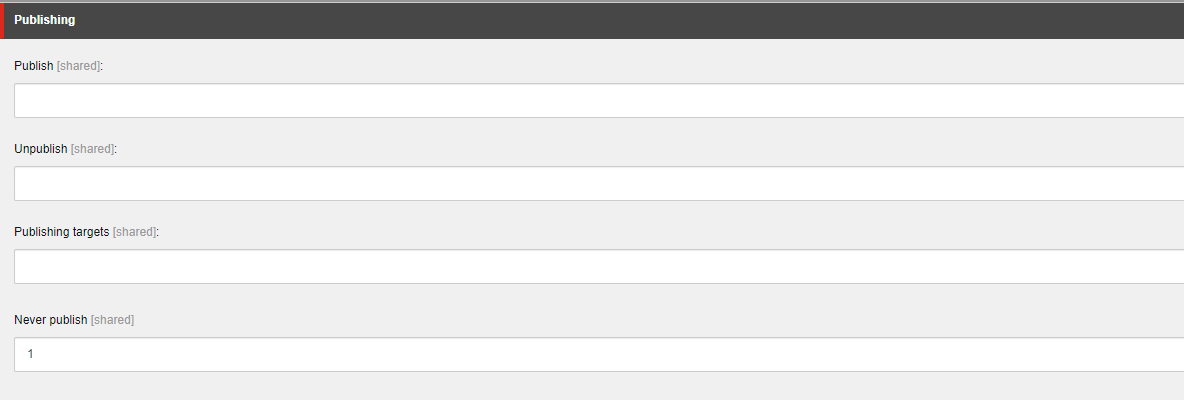
Every item has publishable option. Upon disabling and publishing to web, the item will be removed from web database. If there are multiple items which are need to be deleted, doing it manually will never be a good option. Here is the script which disables the publishing option. The publishable option is disabled by setting the value in the field Never Publish under the section Publishing. This can be viewed by checking the field raw values mode.

Image Text

Here, setting the $item.Fields["__Never publish"].Value to 1 disables the publishable option.

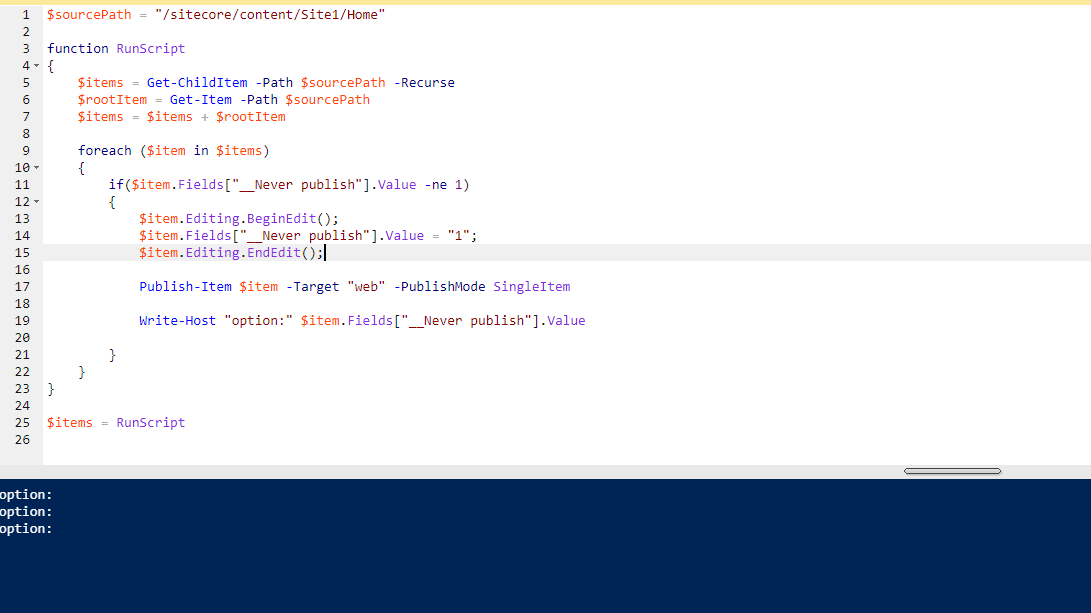
Image Text

Sitecore Powershell script to unpublish items by setting off 'publishable' option

$sourcePath = "/sitecore/content/Site1/Home"
function RunScript
{
    $items = Get-ChildItem -Path $sourcePath -Recurse
    $rootItem = Get-Item -Path $sourcePath
    $items = $items + $rootItem

    foreach ($item in $items)
    {
        if($item.Fields["__Never publish"].Value -ne 1)
        {
            $item.Editing.BeginEdit();
            $item.Fields["__Never publish"].Value = "1";
            $item.Editing.EndEdit();
        
            Publish-Item $item -Target "web" -PublishMode SingleItem 

            Write-Host "option:" $item.Fields["__Never publish"].Value
        
        }
    }
}

$items = RunScript

Image Text

Wednesday, September 15, 2021

How to create a login for Content author in Sitecore

 By default sitecore provides an admin user with userid ‘Admin’ and password ‘b’. However additional users can be created in sitecore by following below steps.

  1. Login to sitecore as admin in desktop mode.

  2. Go to security tools and then user manager.

  3. Click on ‘New’ button present at the top left corner.

  4. Give the Username say ‘User1’, Email Id and Password.

  5. Then click on ‘Edit’ to add Roles to this new user.

  6. Select the following roles from the below list and click on Add. This list provide the roles required for a content author.

    • Sitecore\Developer
    • Sitecore\Sitecore Client Publishing
    • Sitecore\Designer
    • Sitecore\Author
    • Sitecore\Sitecore Client Users
  7. By adding the above roles, the below list of sub roles will be automatically added.

    • Sitecore\Sitecore Client Designing
    • Sitecore\Sitecore Client Configuring
    • Sitecore\Sitecore Client Maintaining
    • Sitecore\Sitecore Client Developing
    • Sitecore\Analytics Testing
    • Sitecore\Analytics Personalization
    • Sitecore\Sitecore Client Authoring
  8. Then click Ok and Finish. We have now created a new user and then assigned the roles of a content author.

Friday, July 23, 2021

Deployment options in Sitecore – packaging vs Serialization

 This post explains the different deployment options available in Sitecore and differences between them. Deployment is nothing but moving Sitecore item changes from one instance of Sitecore to another instance. To do this, in Sitecore we have two different options. 1. Packaging 2. Serialization

Packaging

Creating package & Installing package: Follow this post for complete set of steps to be followed to create a package and then installing this packge in Sitecore. - Deployment in Sitecore using packaging

Serialization

Serializing and Deserializing items in Sitecore: Follow this post for complete set of steps to be followed to create apacgae and then installing this packge in Sitecore. - Serialization and deserialization in Sitecore

Packaging vs Serialization

Deployment Limit

  • For package creation in Sitecore there is a size limit of 2GB. You cannot create a package of more than 2GB size. If the package exceeds 2GB then it has to be done in multiple packages.

  • There is no size limit for serializing the Sitecore items.

Revert option

  • After you deploy the Sitecore items to target instance and then made some changes to most of the items. Now if you want to revert the changes made to some of the items in Sitecore to the previous version (as they are when they are deployed), you cannot revert using the Package option. If you install package again then you might loose the changes which you don't want to. So there is no option to revert selected items to the previous version using Packaging.

  • Using Serialization we can achieve this perfectly. There are options 'revert item', 'revert tree', using which we can either revert a single item or an item tree. This revert option will revert the Sitecore items from disk ie., from the serialization folder.

Image Text

Please comment if you know any more differences between Packaging and Serialization in Sitecore

Wednesday, July 14, 2021

Serialization and deserialization in Sitecore

 This post explains what serialization and deserialization are, how to serialize and deserialize items in Sitecore and how to move Sitecore changes from one instance to another using this concept without creating a package.

If you are looking for differences between Serialization and packaging or advantages of serialization over packaging then go through this post - Serialization vs Packaging in Sitecore

Serialization:

Serialization is the process of converting an object to byte stream in order to save them to memory or database or to file system. Here is the complete explanation of what Serialization is and how it works, from msdn site.

Serializing Sitecore items/tree:

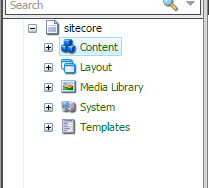
  1. Select the item which you want to serialize. Lets select 'Content' item here

    Image Text

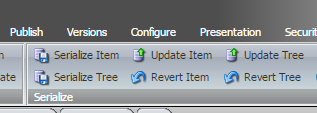
  2. Then click on 'Serialize' or 'serialize tree' option present under the developer tab at the top.

    Note: The 'Serialize' option will serializes only the selected item but the 'Serialize tree' option will serialize the selected item and its sub items.

    Image Text

  3. After you click on this option, there won't be any message to confirm that serialization is done. So do not panic. :)

  4. Go to the Sitecore instance's folder and check the path ' \Data\serialization\master\sitecore' . Here you could see the serialized files of the 'Content' item. i.e., 'Content.Item' file and 'Content' folder. YOu can confirm the same by checking the last updated date of these two.

Deserialization:

Deserialization is the reverse process of serialization. i.e., converting the byte stream to an object.

Deserializing Sitecore items/tree:

  1. Go to the path 'SitecoreFolder\Data\serialization\master\sitecore'

  2. Copy the 'Content' folder, 'Content.Item' file and paste in destination folder. The destination folder is nothing but the target machine to which you would like to move the changes. Main the same folder structure in destination Sitecore instance. i.e., Copy those two under 'DestinationSitecoreFolder\Data\serialization\master\sitecore' folder.

  3. Now to go the Sitecore content editor, select 'Content' item and click on 'Revert tree' option under Developer tab. A dialogue box will open showing the progress of the revert option. Sitecore will read the serialized files on the desk (the files what we copied just now) and revert the select item and its sub elements as per the files. Thus the changes are moved from source to destination Sitecore instance.

Serialization and Deserialization using Sitecore admin page:

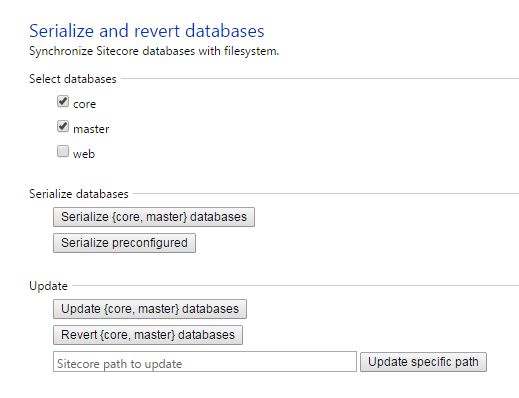
Sometimes we might need to serialize entire database or multiple database i.e., core and master databases. In that situataion you need not to switch databases, instead we can use the Sitecore provided admin page for serialization

Admin page Path: http://domainName/sitecore/admin/serialization.aspx

Image Text

When you open this page, you can see options to select the database and then to choose whether to serialize or revert databases. So select serialize in the source machine and then copy the entire folder and in the destination path. Then select database in the destination sitecore instance and click on revert option to deserialize.

Source: https://sdn.sitecore.net/upload/sitecore6/64/serialization_guide_sc60-64-a4.pdf

Hope you like this article. Please share our thoughts in the comments below. :)

Friday, June 25, 2021

List of Sitecore admin pages

 Sitecore provides a list of admin pages which are very useful but rarely used by any developer. Also, it is not very well documented and known to many developers, so thought of putting them here. Here are the list of Sitecore admin pages and their brief usage.

List of sitecore admin pages and their use

1. Cache.aspx###

- /sitecore/admin/cache.aspx

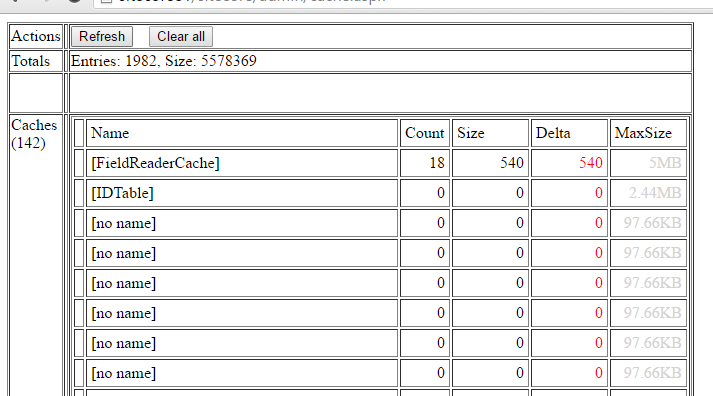
Image Text

The cache.aspx page displays all the details about the cache settings and allocations. It includes current levels of cache and max limits of all the enabled caches. This will be useful when you are fine tuning the cache settings in sitecore and also to clear Sitecore cache.

2. Serialization###

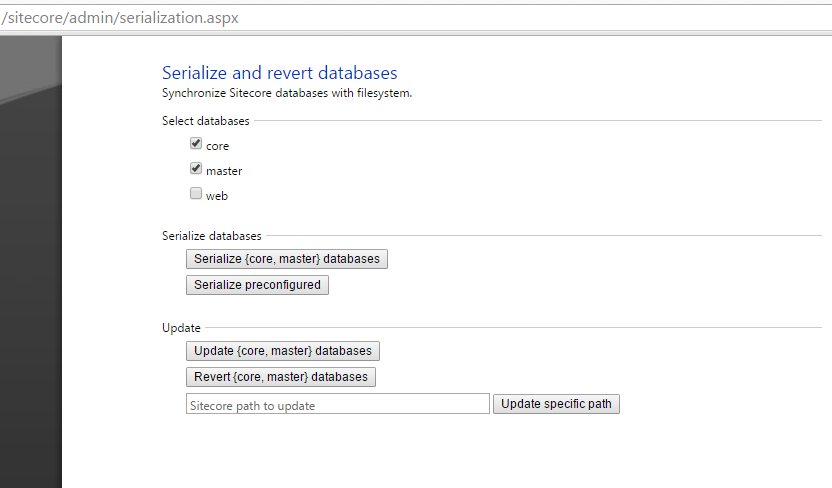
- /sitecore/admin/serialization.aspx

Image Text

This page is used to serialize Sitecore items or entire tree. For more details on Serialization in Sitecore go through this post - Serialization and deserialization in Sitecore

3. DB Browser###

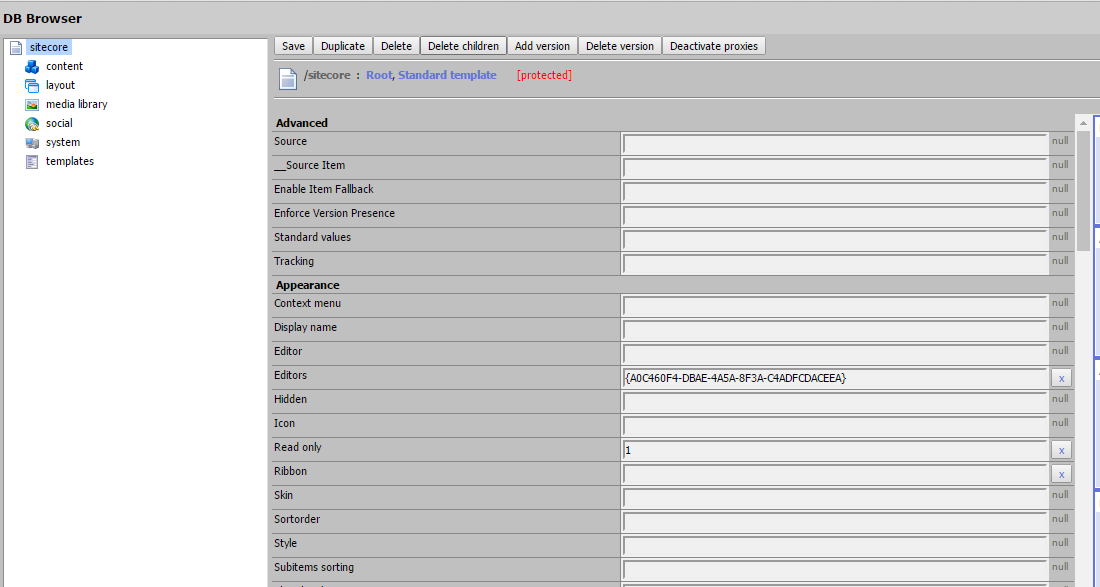
- /sitecore/admin/dbbrowser.aspx

Image Text

DB browser is used to browse through all the Sitecore databases and their items in tree view as in the content editor. it is a very light weight view with all the item's fields, versions, languages.

There is an additional option to delete all the children of a Sitecore item. We do not see this option in the content editor too.

4. Show Configuration###

- /sitecore/admin/showconfig.aspx

Image Text

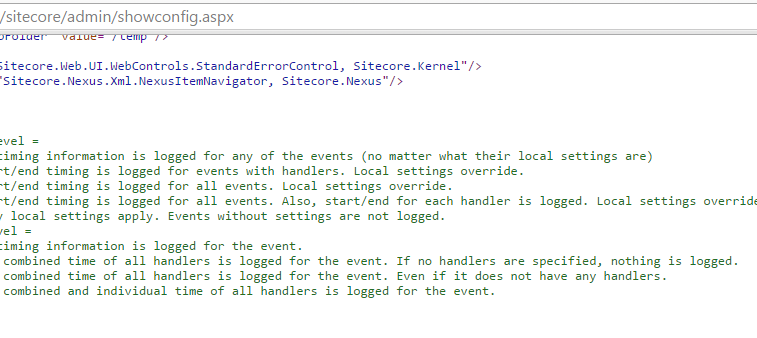
Shows the final and complete view of configuration settings that are applied to the Sitecore instance. The 'App_Config/Include' folder contains a lot of config files and there may be a setting configured differently in different files. To know which settings actually got applied, you can check it in the this admin page.

5. Statistics###

- /sitecore/admin/stats.aspx

Image Text

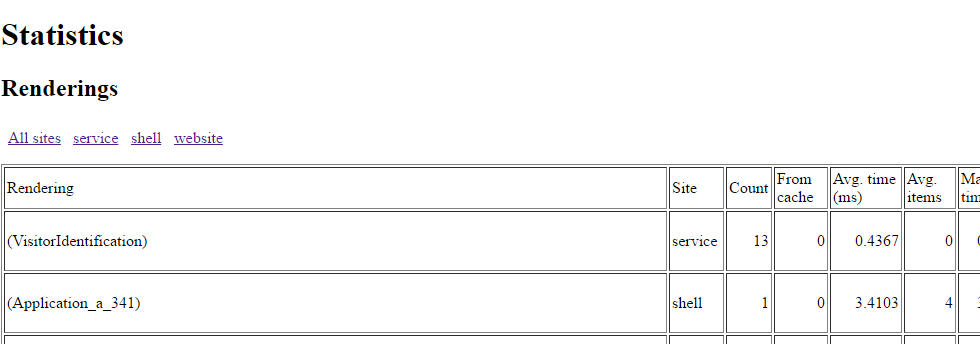
This page includes complete statistics of all the sites in the instance their load times and count. It is helpful when you are fine tuning the settings for higher performances.

6. Unlock Admin

- /sitecore/admin/unlock_admin.aspx

This page is used to unlock the admin account if it has been locked. If the login fails for certain number of times, the account gets locked. If it happens for the admin account then this page can be used.

7. Update Installation Wizard###

- /sitecore/admin/UpdateInstallationWizard.aspx

Image Text

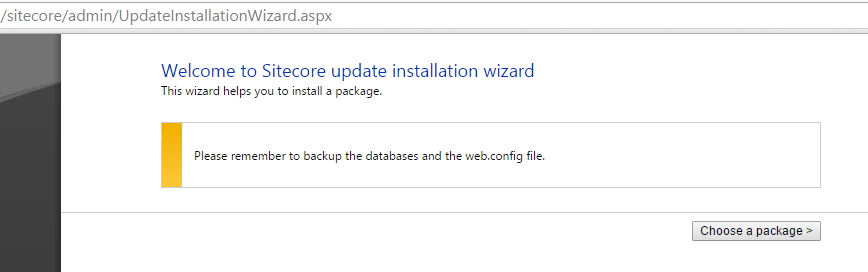
This page is used in upgrading the Sitecore instance. We can upload a package and upgrade the instance using this page.

8. Restore###

- /sitecore/admin/Restore.aspx

Image Text

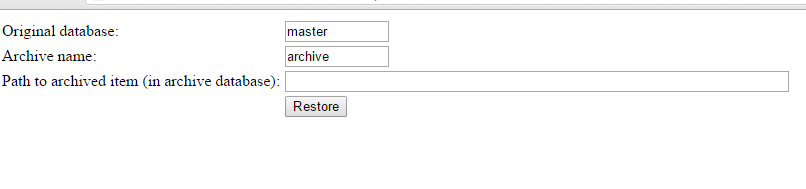
This page is used to restore items from archive to a database.

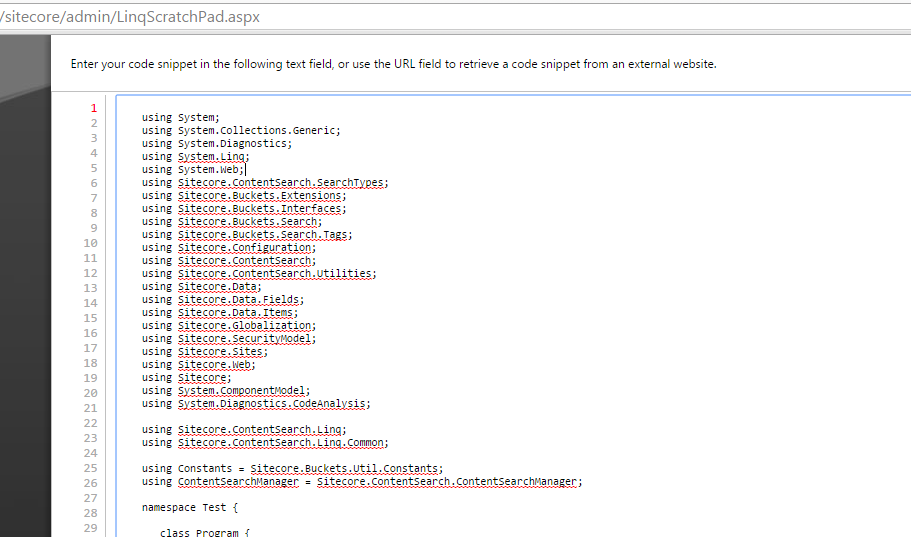
9. Ling Scratch Pad###

- /sitecore/admin/LinqScratchPad.aspx

Image Text

This is a good tool to test your linq queries including the search queries, indexes etc. For more information go through this Sitecore blog post

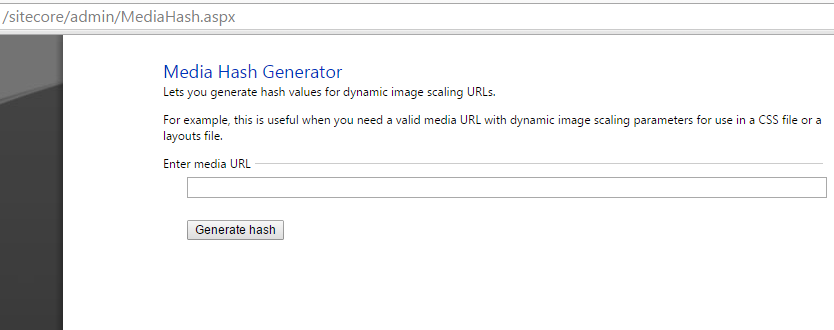
10. Media Hash Generator (From Sitecore 7.5)###

- /sitecore/admin/MediaHash.aspx

Image Text

It helps to generate a media url with dynamic image scaling properties by appending a media hash to the URL.

Every static resource loaded from media library in Sitecore will be appended with a hash in its URL for security reasons. This hash will be generated automatically and it will be unique.

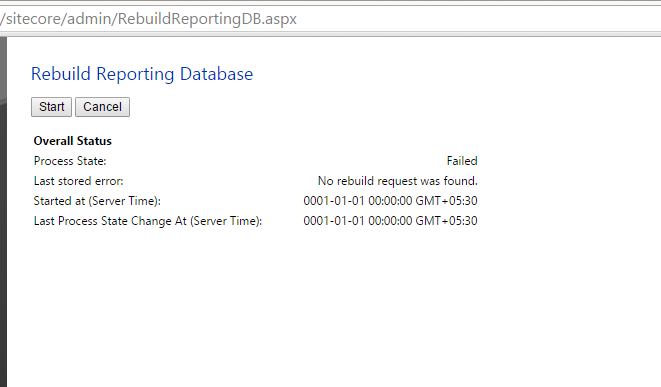
11. Rebuild Reporting Database (From Sitecore 7.5)###

- /sitecore/admin/RebuildReportingDB.aspx

Image Text

This page is used to rebuild the entire reporting database. If your start the rebuilding, make a note that the reporting database will not be available until it is rebuilt completely. So be careful if you are trying to do this in production environment.

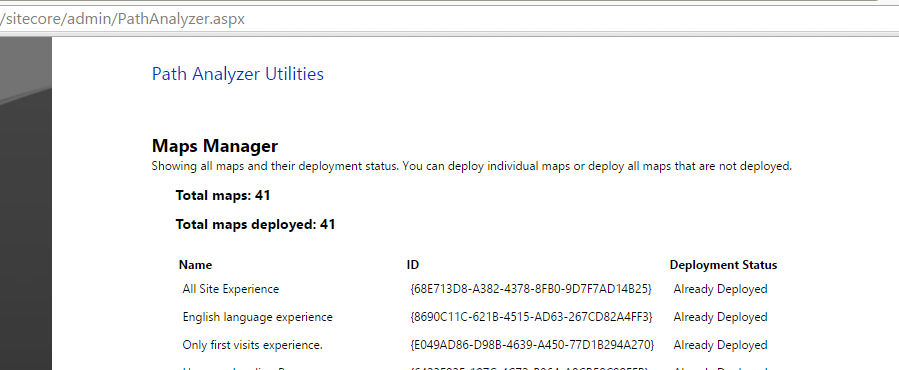
12. Path Analyzer (From Sitecore 8)###

- /sitecore/admin/PathAnalyzer.aspx

Image Text

This was introduced with Sitecore 8 under Experienced Platform. It allows to create a map that shows the paths that contacts take as they navigate through Website, campaigns, goals and events.