Wednesday, December 22, 2021

Sitecore PowerShell script to remove all language versions except one

This post provides Sitecore PowerShell script to remove all lang versions except one for items under a Sitecore node recursively.

Here in my example, removes all language versions except for English language.

In some cases you may want to remove versions of an item or an entire node in all languages except one or few languages. In that case it is difficult to remove them manually. Instead if we can use a PowerShell script in Sitecore, it would make our job very easy.

Is this not the script you are looking for? Then check the complete list of Sitecore Powershell scripts

Steps:

  1. Retrieve all the child items recursively. Include the root item too.
  2. For each item, get all the versions in all languages.
  3. Check if the language version retrieved is the one you want to remove.If so, use the Remove-ItemVersion to remove that particular version.

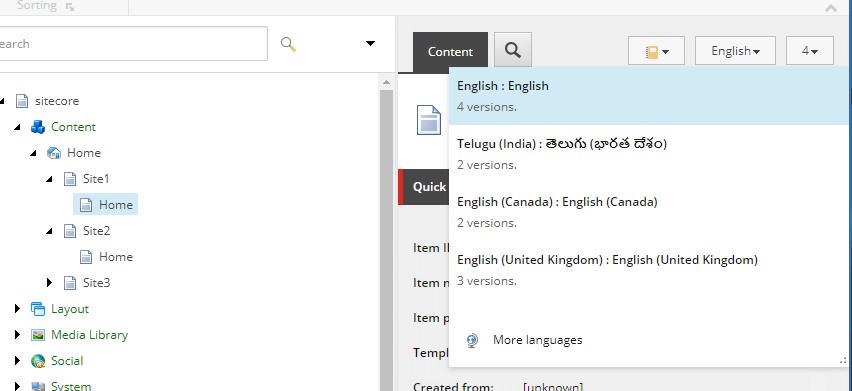
With versions

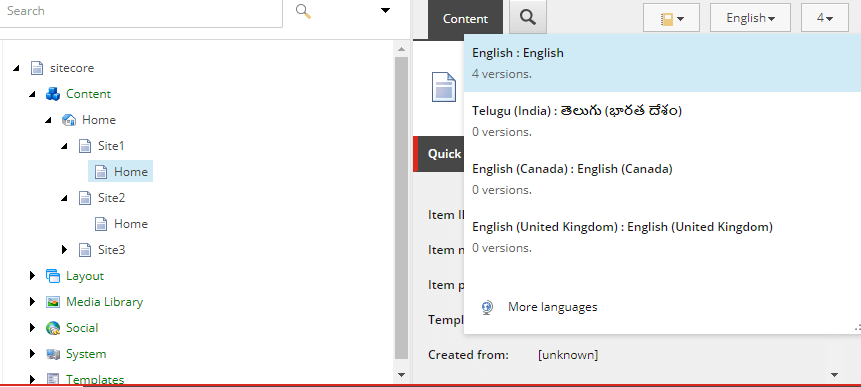
Versions deleted

Sitecore PowerShell script

$props = @{
   InfoTitle = "Remove Versions"
    PageSize = 10000000
}

$sourcePath =  "master:/sitecore/content/Home/Site1"

function Remove-Versions {

    $items = Get-ChildItem -Path $sourcePath -Recurse
    $rootItem = Get-Item -Path $sourcePath
    $items = $items + $rootItem

    foreach ($item in $items)
    {
        foreach ($version in $item.Versions.GetVersions($true))
        {
            if ($version.Language -ne "en")
            {
                Remove-ItemVersion $version
                Write-Host $version.ID " - " $version.Language "- deleted"
                $version;
            }
        }   
    }

}

$items = Remove-Versions
$items | Show-ListView @props -Property ItemPath, ID, @{Label="Language"; Expression={$_."Language"}} 
Close-Window

Wednesday, November 17, 2021

Sitecore Powershell script to unpublish items

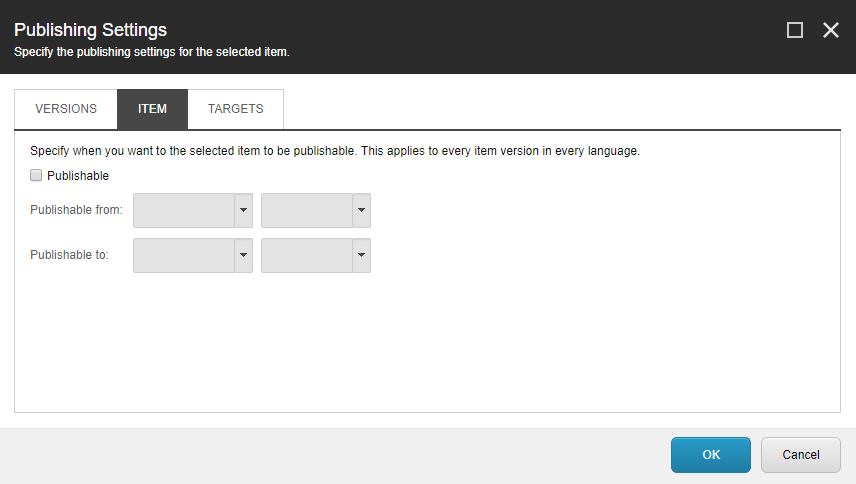
If you want to delete or unpublish all items under a root item using PowerShell script then this is the post you are looking for. This script disables the 'publishable' option of an item in Sitecore.

Is this not the script you are looking for? Then check this complete list of Sitecore Powershell scripts

Unpublishing an item

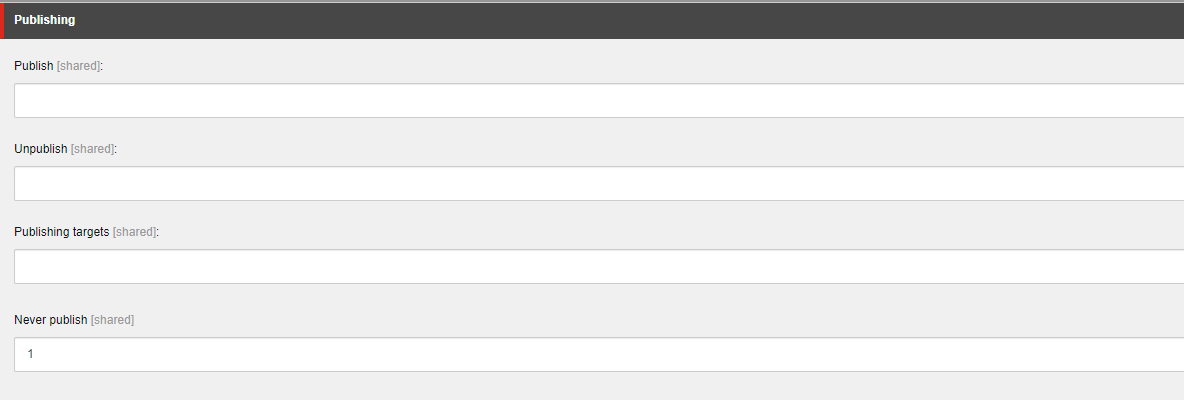
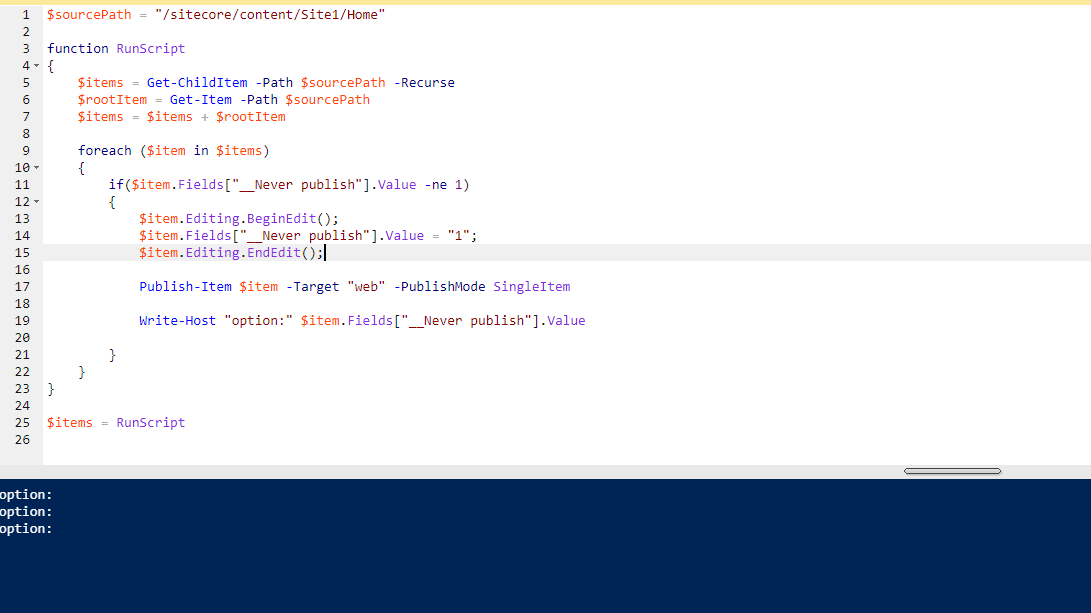
Every item has publishable option. Upon disabling and publishing to web, the item will be removed from web database. If there are multiple items which are need to be deleted, doing it manually will never be a good option. Here is the script which disables the publishing option. The publishable option is disabled by setting the value in the field Never Publish under the section Publishing. This can be viewed by checking the field raw values mode.

Image Text

Here, setting the $item.Fields["__Never publish"].Value to 1 disables the publishable option.

Image Text

Sitecore Powershell script to unpublish items by setting off 'publishable' option

$sourcePath = "/sitecore/content/Site1/Home"
function RunScript
{
    $items = Get-ChildItem -Path $sourcePath -Recurse
    $rootItem = Get-Item -Path $sourcePath
    $items = $items + $rootItem

    foreach ($item in $items)
    {
        if($item.Fields["__Never publish"].Value -ne 1)
        {
            $item.Editing.BeginEdit();
            $item.Fields["__Never publish"].Value = "1";
            $item.Editing.EndEdit();
        
            Publish-Item $item -Target "web" -PublishMode SingleItem 

            Write-Host "option:" $item.Fields["__Never publish"].Value
        
        }
    }
}

$items = RunScript

Image Text

Friday, November 5, 2021

Creating Your Own Styles Using Sitecore SXA

 Today I would like to talk about how to use your own Style in SXA. For those who have never had the opportunity to work with SXA, it is a very powerful tool for creating standardized sets of layouts and components based on recommended practices that can be used across multiple sites.

When we talk about styles in SXA, we first need to start by talking about Themes. Using Themes, you can define the appearance of a site without having to change the site itself or its content.

When you install SXA, you may notice that it already comes with a default Theme, called Wireframe, to help you get started. However, it is possible to create a custom Theme for the site that you are working on. Any new theme that you create will inherit from the default Theme.

By right-clicking the Content node, I created a Tenant and a site called Fernando. (Tenants are a feature of SXA).

Content Tree with Tenant Node expanded

After creating my site, SXA automatically created a folder with the name of my website inside Media Library -> Themes. As stated above, it already comes with Wireframe (default Theme) created.

Content Tree with Themes expanded

SXA will automatically break new themes into folders with necessary scaffolding items. If we open the style folder, we can see the classes that have already been created by the SXA separated by components and functionalities.

Styles folder expanded in content tree

Let's start with a simple example, in which we change the background color of an image. For this, we will open the class corresponding to the image component (later I will show where it does the css link with the component). An easy way is to select the component you want to change (component-image) and search the field Media and download it.

Media field in component style item

I just opened the .css file and created these two simple classes, one to paint the background in black and the other to paint red. After changing, we will click Attach to upload the changed file.

.image-techguildsblack img {

  background-color: black;

}

.image-techguildsred img {

  background-color: red;

}


Now comes the coolest part in my opinion, where we make the connection of the class I created with the component.

Let's open our site in Content root and navigate to Presentation / Styles. Here we’ll link our class to our component. Every Component has its own Style item underneath the “Styles” node. In here, right-click the “Image” component to add new Style items.

Style items underneath Component item in content tree

After we create a Style, we have to fill the “Value” field with the proper class name. In the Allowed Renderings, select the components to which the class will apply (here we selected the Image component).

Style section including allowed renderings

After saving everything, lets open our page through the Experience Editor. In the XPE, I just selected Image through the SXA Toolbox, I added an image in the data source and went on to edit the properties of the component.

Inside control properties we go down to Styling. In the Image session we can see the two Styles we created in the previous step.

Control properties window with style slections

After clicking save, our background changes to black.

TechGuilds header black background

Switching to Red in just one click.

TechGuilds Header Red Background

Thanks for reading! I hope my guide on customizing styling with SXA was been helpful!

Monday, October 11, 2021

Install Sitecore 9.3 using 3 Simple Commands

 Sitecore 9.3 was announced at the Sitecore Symposium 2019 and I am excited to share 3 simple commands to get you going on your development machine or laptop. This release is now available from dev.sitecore.net to download.

Command 1 – Install Sitecore Pre-Requisites

As Sitecore moved from version 8.x to version 9.x, the installation process completely changed and required to install additional pre-requisites. There is a long list of pre-requisites and I have seen developers keeping a checklist of software that they need to install for a new instance of Sitecore on their machine or on client’s server. There is an alternative way, which has been part of the installation script since Sitecore 9.1 but not widely used. It is the Prerequisites.json file for installing pre-requisites. The easier and simpler way is to run this SIF command via PowerShell:

Install-SitecoreConfiguration –Path “.\Prerequisites.json”

This command will not only download all of the required software but also install it on your behalf. I recently used this command on a vanilla VM and it took about 12 minutes to download and install everything. Notice in the screenshot below that it skips the already installed components:

Command 2 – Install Solr

For any Sitecore version 9.x to be installed locally, Solr (or Azure Search) is required to be installed and working correctly prior to installing Sitecore. Typically, a developer has to download and install Solr from a zip package, install it as a windows services and also install its SSL certificate (forgot to mention that you need to install Java SDK and setup its home path if you are on a brand new machine!).

Well, all of the above is now thing of the past, just open this Solr-SingleDeveloper.jsonfile, update simple parameters like what version of Solr you want, what port number you would like to associate it with and what should be default install location and run this SIF command:

Install-SitecoreConfiguration “.\Solr-SingleDeveloper.json”


This is a MAGIC script and it did everything that would have taken anyone several hours to figure out, if it was their first time. Once the command was completed, I verified that the Solr was up and running over the specified SSL port!


Command 3 – Install Sitecore

Lastly, I opened up the XP0-SingleDeveloper.ps1 PowerShell script, change the essential parameters like site name and database parameters and ran the following script:

.\XP0-SingleDeveloper.ps1

New Feature: By popular demand there is a new SIF parameter as SitePhysicalRoot.  If that is left empty, the default path will be \inetpub\wwwroot otherwise it will be the new path location.

If you have everything installed correctly then you will have a successful installation!!

Once the installation was complete, I was able to login (full marks for guessing the password)

I have started exploring the new features like the the new Experience Optimization Dashboard


Happy Sitecoring!